I’m so excited you are interested in milling your own flour! If you missed my post on why I started milling (and why you might want to start, too!), check out the post here.
To get started, you will need a grain mill and some grain!
Grain Mills
At a minimum you will need a way to mill your grain. The most popular types of mills are impact mills and stone mills.
Impact Mills
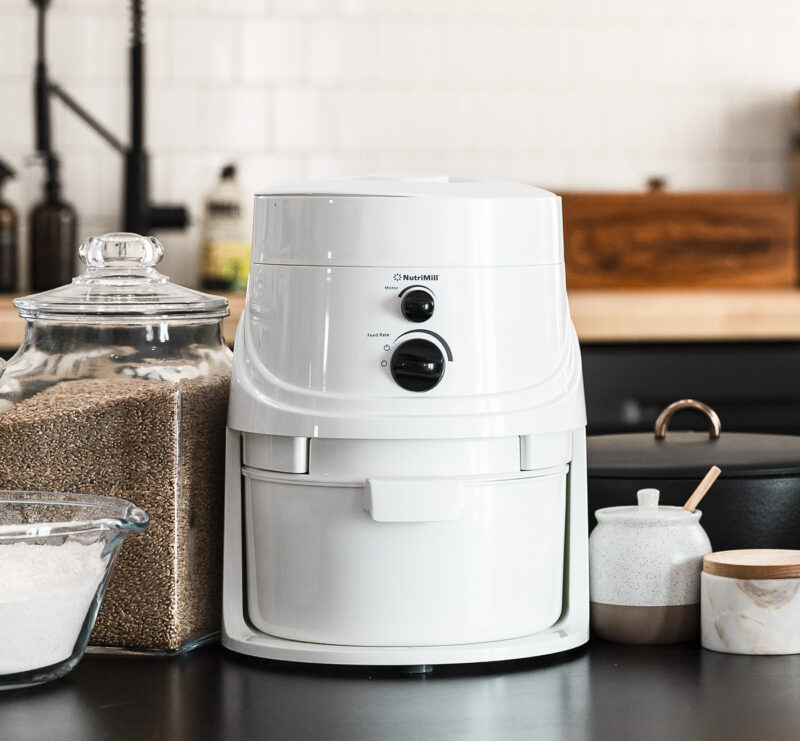
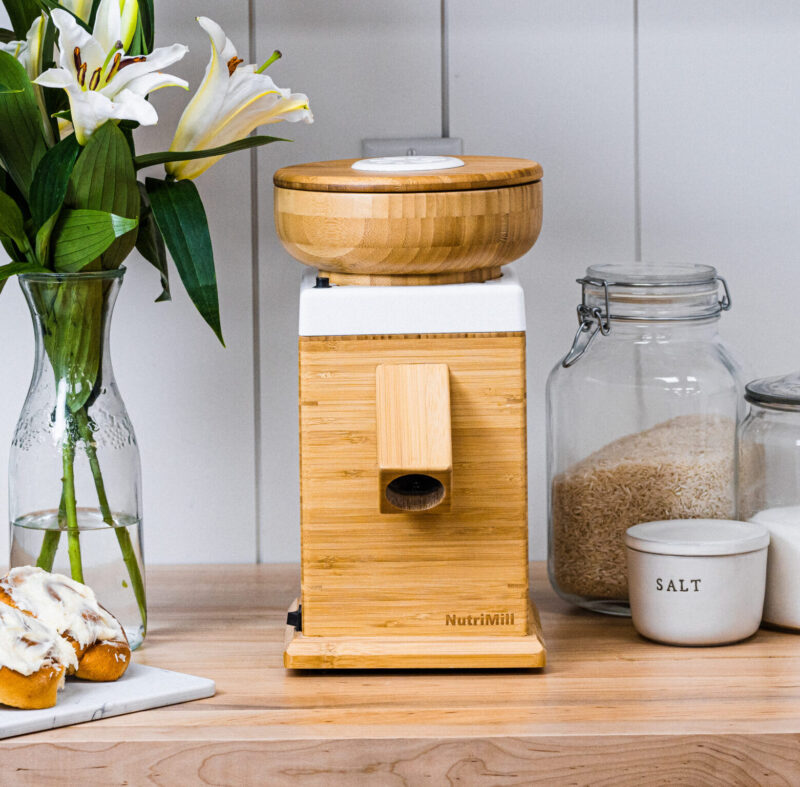
The impact mills have steel blades, are typically less expensive, and often can mill more types of grain including corn. This varies from mill to mill, so check specifics as you are doing research. They are enclosed, so you just pour in your grain, turn them on, and let them run while you are doing other things. Sue Becker uses an impact mill, so that is good enough for me! I have the NutriMill Classic (an impact mill), many people have used their Classic for decades so I knew it would be a solid choice. I got a great deal on it, so I purchased it in order to get started right away! It is about the size of an Instant Pot, a little taller.
NutriMill actually makes 2 impact mills, the NutriMill Classic (shown below) and the NutriMill Impact. (You can use code WELLOILED to save $20 at NutriMill) The WonderMill is also an impact mill and is the one Sue uses.
Stone Mills
Many people gravitate toward stone mills because they are smaller and typically look nicer, especially if you are going to keep your mill out on the counter. Stone mills grind the flour straight into your bowl instead of the mill’s container. They are typically quite a bit more expensive than impact mills. One concern that I’ve seen brought up multiple times on the stone mills is what the actual ‘stones’ are made of, because they are not a natural substance. Obviously stones start to wear away, and that ends up in your flour. I’ve done some research on this, some people say it is negligible, others are very concerned. For me, the jury’s still out, I would need to research more. I may switch at one point, but for now I’m comfortable using my impact mill. But here is an example of a stone mill, they are pretty!
Other available options include a grain mill attachment for your mixer (such as the one for the KitchenAid mixer) or the Vitamix Dry Grains Container. If you are serious about milling your own flour, these are not the best options. I have had multiple friends try both options, and they all got returned. They don’t mill the flour as fine as an actual mill, which changes the texture of your baked goods.
Is a grain mill the only equipment I will need?
Technically, yes. Especially if you are only making baked goods that require baking soda or baking powder, such as pancakes, muffins, waffles, cookies, and the like. You can mix these by hand or with a hand-mixer, just as you normally would.
However, if you plan to make yeasted breads (loaves of bread, rolls, hamburger buns, cinnamon rolls, pizza dough, etc.), you will either be spending time kneading your bread by hand (which some enjoy!), or you will want a mixer. Unfortunately, many mixers cannot handle the dough without burning up the motor. Even KitchenAid mixers cannot typically handle dough made with freshly milled flour on a weekly basis. Some people opt for a heavy-duty mixer, such as a Bosch or Ankarsrum. These are very pricey but make frequent bread-making much more doable!
The other option is to get a heavy duty bread machine. It can obviously knead and bake your loaves of bread, but it can also double as a mixer to make your dough! In other words, if you want dinner rolls for example, you can use the bread machine for kneading the dough, then pull it out to shape and bake the rolls. The Zojirushi Virtuoso and Zojirushi Supreme are known to hold up to dough made with freshly milled flour, and they have custom cycles on them for setting your own kneading, rising, and bake times. However, others have had success with less expensive bread machines as long as they have 2 paddles. I don’t know how long these less expensive models hold up for, but it may be an option to research! I have an older model of the Zojirushi Virtuoso and love it (Virtuoso shown below).

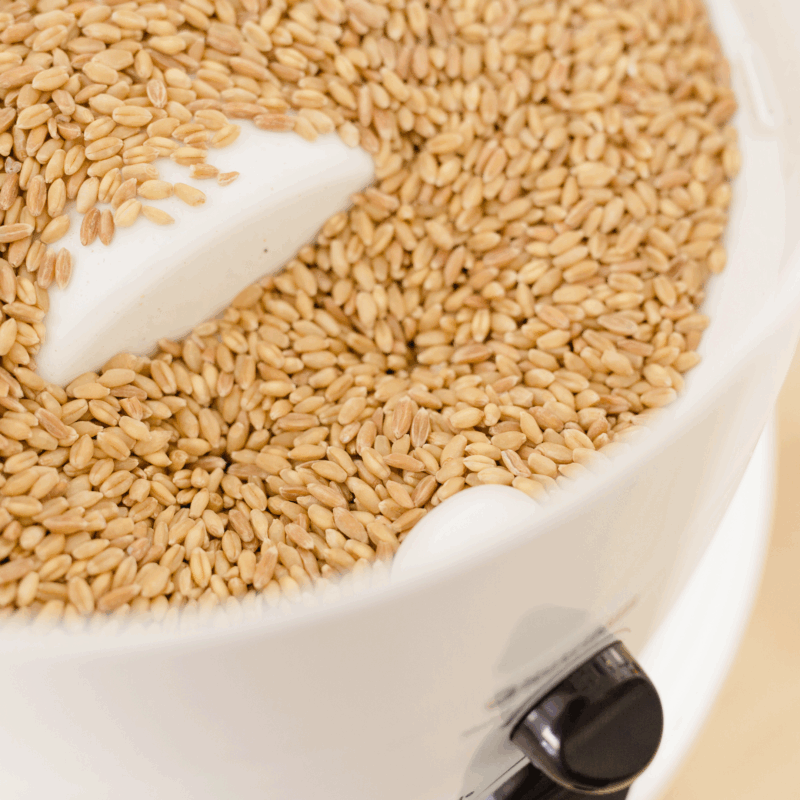
Wheat Berries
Once you start learning about freshly milled flour, there are MANY different types of wheat and grains you will hear about! To keep it simple, remember that hard wheat needs to be used for anything with yeast. It has a higher protein content and the gluten required for your bread to rise. You can get hard white wheat berries, which are a little lighter in color, and hard red wheat, which is darker in color and has a more robust, ‘nuttier’ flavor. I use both hard white and hard red! If you are transitioning your family from regular bread to freshly milled flour, hard white might be an easier transition.
For baked goods made with baking powder or baking soda such as cookies, pancakes, waffles, and muffins, many prefer soft white wheat for its more delicate texture. But you can play around with grains! Some other grains you will hear about are spelt, einkorn, Kamut (khorasan), and more.
A good starting place would be to get a hard wheat (white or red) and soft white wheat. Just remember… if a recipe calls for yeast, you need a hard wheat berry!
Where do I get wheat berries?
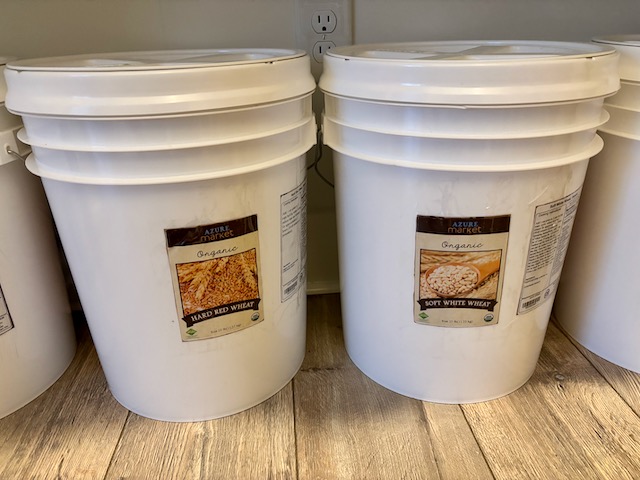
I have gotten all my grains from Azure Standard and have been very happy with them. If you’ve never heard of Azure, it’s basically a nationwide co-op, so their prices are typically some of the best you can find, and they have organic wheat berries. The downside of Azure is you have to be available to pickup at your drop location on a specific date and time that you don’t get until the week of the delivery (AFTER you’ve placed your order). This is not convenient for everyone, and you also might not have an Azure drop in your area. But if you do, their prices definitely make figuring it all out worth it!
You can also find organic wheat berries on Amazon, but often it is less expensive to shop direct. Some options are Ancient Grains (note they do not currently carry soft white wheat), Palouse Brand (they are not organic but are non-GMO and have certified glyphosate-free options), 4 Generations Organic Farms, and Pleasant Hill Grain, among others.
What else will I need?
Many recipes call for honey and olive oil, so you may find yourself using those more than you normally do. Costco has both high quality organic olive oil and organic honey! If you are making yeast breads, especially if you are using a bread maker, you will need an Instant Yeast (different than Dry Active Yeast). I use and recommend Saf Instant Yeast, and I keep it in a mason jar in the freezer.
If you are buying large quantities of grain, you will want something to store it in. I buy 25 pound bags of grain usually, so I use 5-gallon food-grade buckets to store my grains, and I use gamma-seal lids that easily twist on and off the buckets. I got my food-grade buckets from Azure, but you can also get them at places like Tractor Supply. The best deal on gamma-seal lids I could find was at Menards!
Recap of what’ll you need
That was a lot of info 😂 Here is a quick recap of what you’ll need to get started:
- Grain Mill
- Mixer/Bread Machine (optional)
- Grains
- Olive Oil, Honey, Yeast (depends on what you’re making)
- Storage Buckets and Lids
If you’d like a ‘quick and dirty’ list of these resources, check out my Bread Resources page. I hope this helps get you started!